
Let’s see what actually is Home Assistant and Shelly TRV intelligent temperature control? If you have radiators in your home then don’t stop reading as the things that you will about see here can save you money or time or even both in the long run, as we are going to talk about Intelligent Temperature Control with Home Assistant and Shelly TRV.
TRV stands for the Thermostatic Radiator Valve and Home Assistant stands for… you know that or if you don’t – check my FREE webinar at https://automatelike.pro/webinar where I’m talking about it in details.
Table of Contents
TRV Types
Back to TRVs – they can be manually adjusted that is the old and boring way…

Using such manual TRV, you have to go through each radiator and close the valve every time you wish to open the window for example. On the other hand, a TRV can be Smart and they can be controlled remotely either from a mobile app or even better from a centralised system like Home Assistant.
Shelly TRV
A great example of a smart Thermostatic Radiator Valve or TRV is the new Shelly TRV and guess what I have one in my hands for tests.

As always I’m going to add it to Home Assistant and I will make some real life Home Assistant automations for you, but first let’s see the good and the bad of the Shelly TRV.
How to install Shelly TRV?
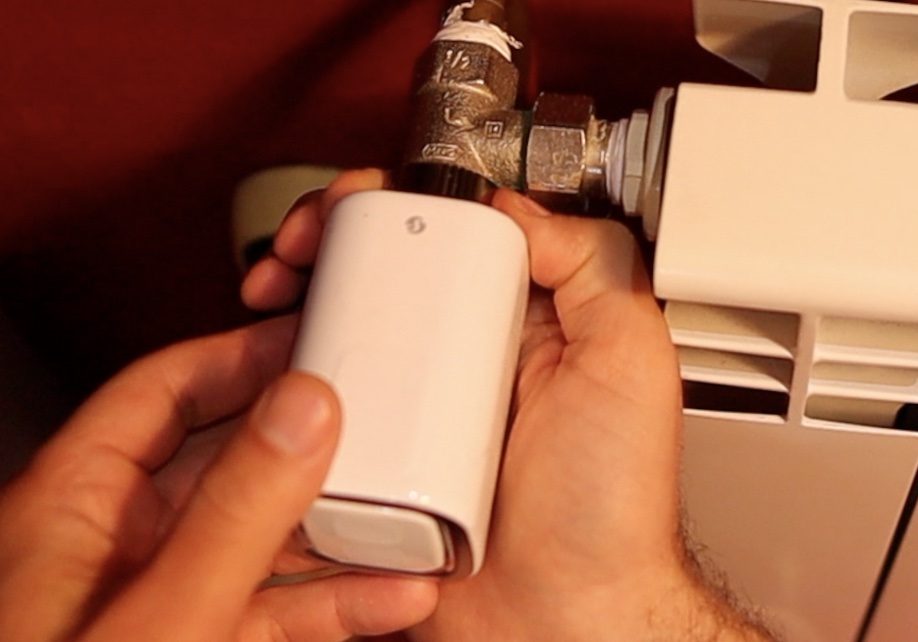
I will list several Shelly TRV features that grabbed my attention when I initially saw it. First thing that I want to mention is that the installation of Shelly TRV was very easy.
- I just had to remove my old TRV – to fully open the old valve and to unscrew the metal ring.
- Several adapters are included in the Shelly TRV package, they are RA, RAVL and RAV
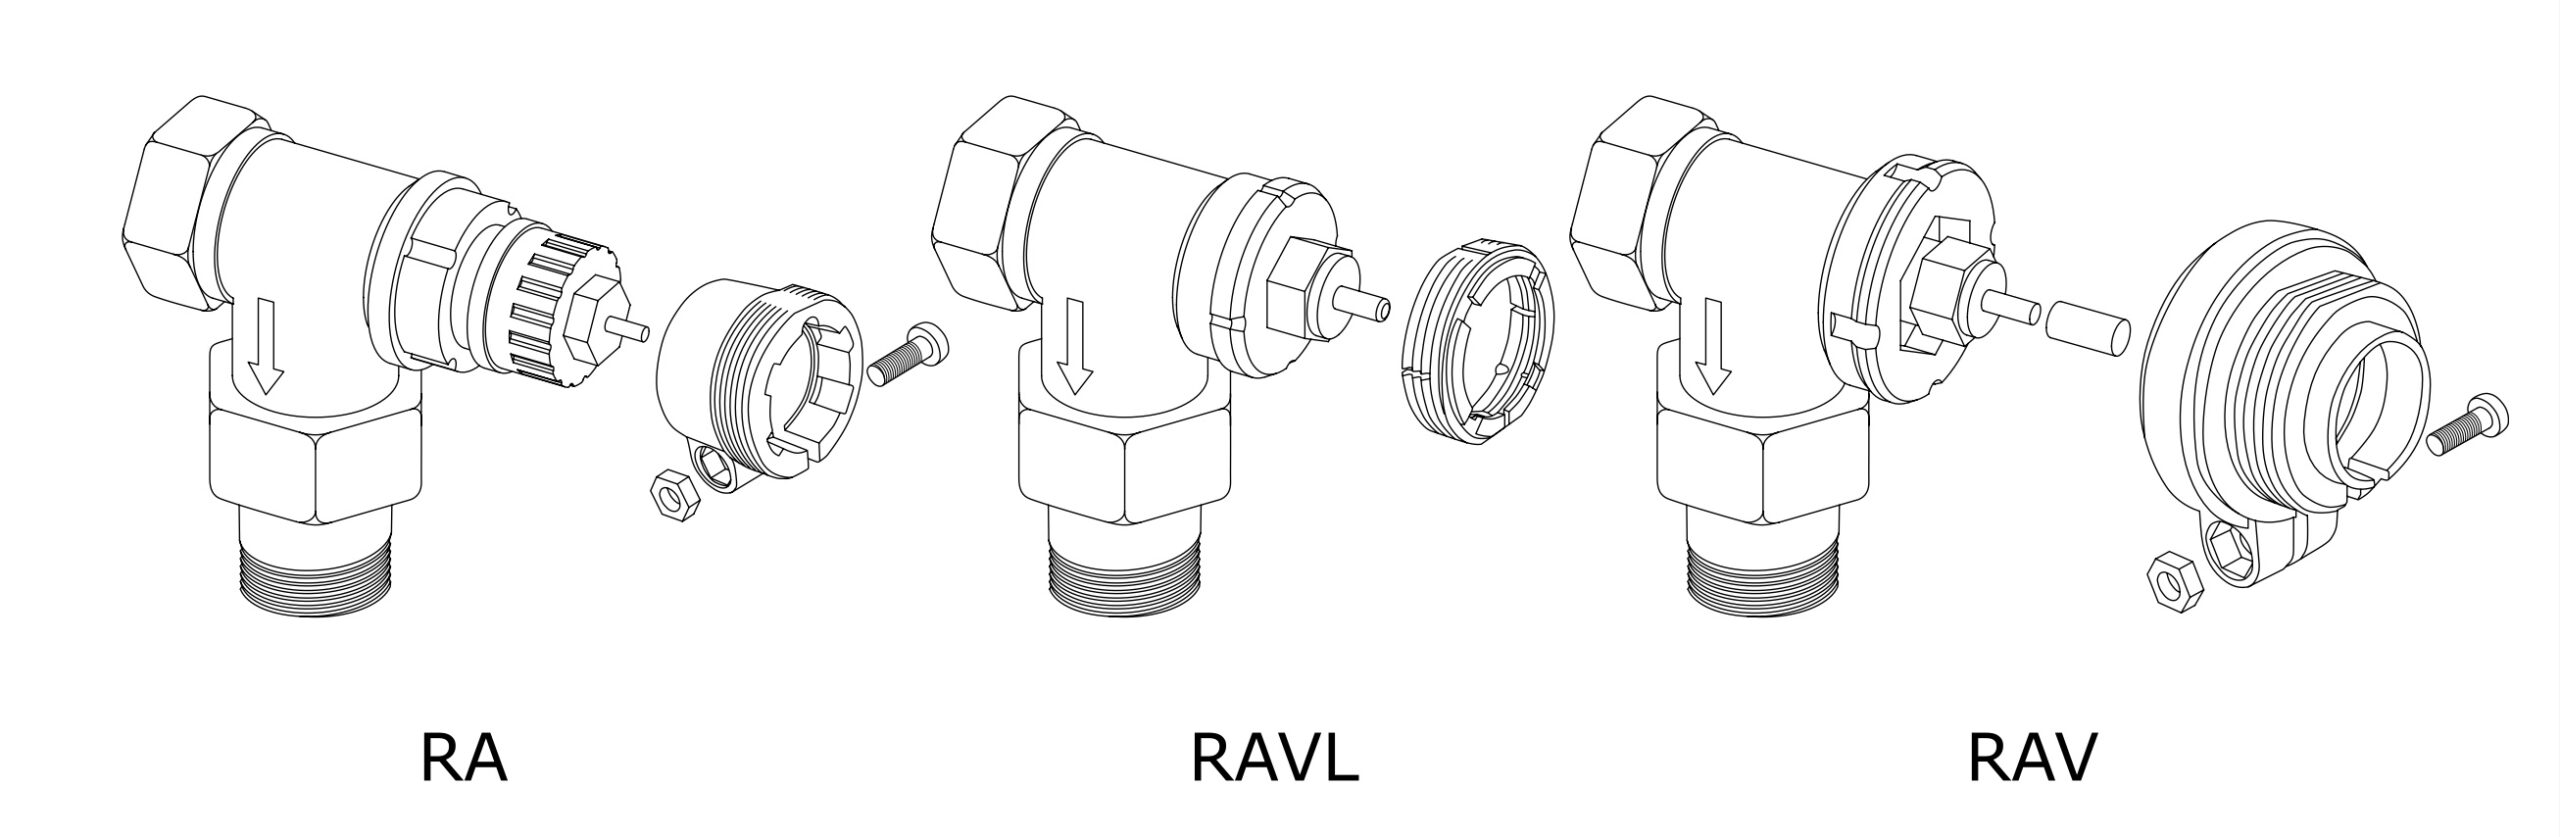
- There is a PDF with a lot of pictures where you can check if the Shelly TRV will fit your radiator. Check that first and if necessary, mount the suitable adapter before installation.
- In my case the adapter was right and I didn’t have to change anything.
- Then, I had to install the Shelly TRV by fasten the metal ring clockwise.
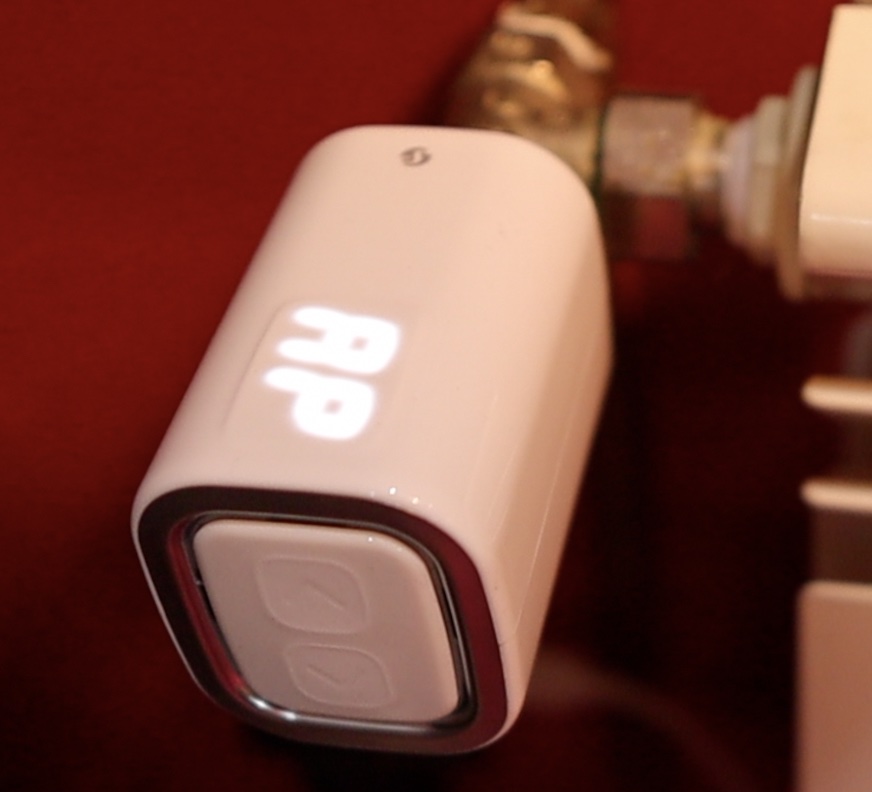
- When everything was done a brief press of the reset button was needed to turn on the device and then I heard the motor inside that was going through the calibration process.
- When the calibration process is finished successfully, the screen will display AP. That means the device is ready to be connected to the Wi-Fi network.
To connect the device to your WIFI – the Shelly Mobile app can be used, which is available in both Apple and Android stores for free. I will not go through the pairing process as it is very, very easy. You just have to follow the instructions that the Shelly Mobile app will provide.
Instead, I will continue with the other things that I liked about the Shelly TRV and the next one was the battery.
The Shelly TRV Battery
Shelly TRV is a battery powered device and that battery can last up to 2 years. After that you just have to recharge it with a USB-C cable. To fully charge the batter around 5 hours are needed.
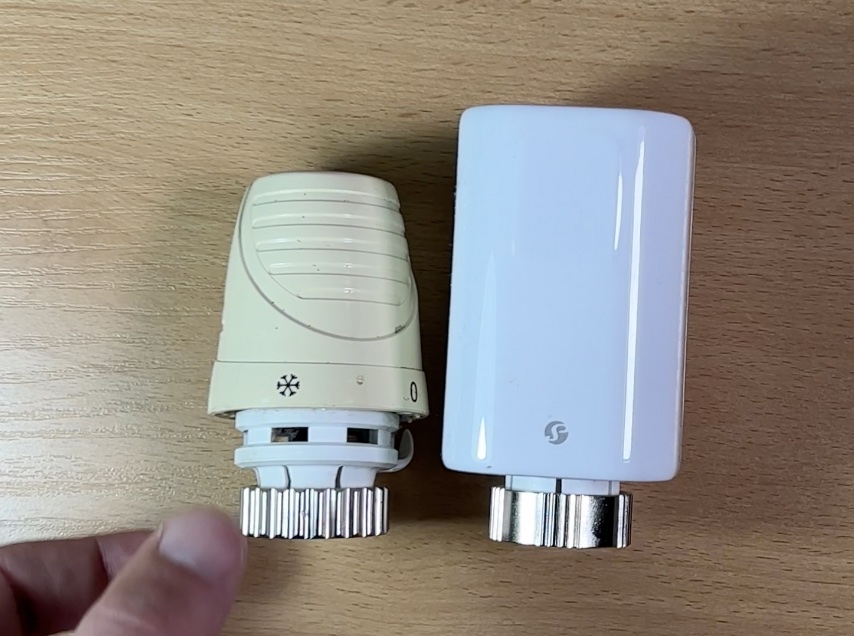
However, maybe because of the battery the size of the Shelly TRV is a bit big (Dimensions (HxWxL): 62x53x94 mm), and if you are tight on space this could be a problem, so check that in advance.
The Shelly Software & APIs
Shelly is a well known brand in the Smart Home world as they already have some killer products, like their smart relays (check my article about the Shelly Plus devices).
But it is not only that, their software and their APIs allowing you to connect their products to practically any decent Smart Home hub without any modifications of the Shelly device. Flashing custom firmwares like Tasmota or ESPHome is also not needed as you can natively use REST, MQTT, and CoAP protocols to connect the Shelly TRV to any Smart Home system you wish. Of course, integration with voice assistants like Amazon Echo & Google Home is also officially supported and possible. Shelly TRV is compatible out of the box with Home Assistant and now it is the best time to show you that in details.
Home Assistant Shelly TRV integration
Before you proceed further, make sure that you successfully connected the Shelly TRV to your WIFI. After that execute the following steps:
- First, upgrade your Shelly device to the latest possible firmware. This can be done from the Web interface of the device or from the Shelly mobile app. Do not skip this step as you may face some issues.
- Then, open to the Shelly Web interface of the TRV by typing the IP of the device in a new browser/tab (or use the mobile Shelly app).
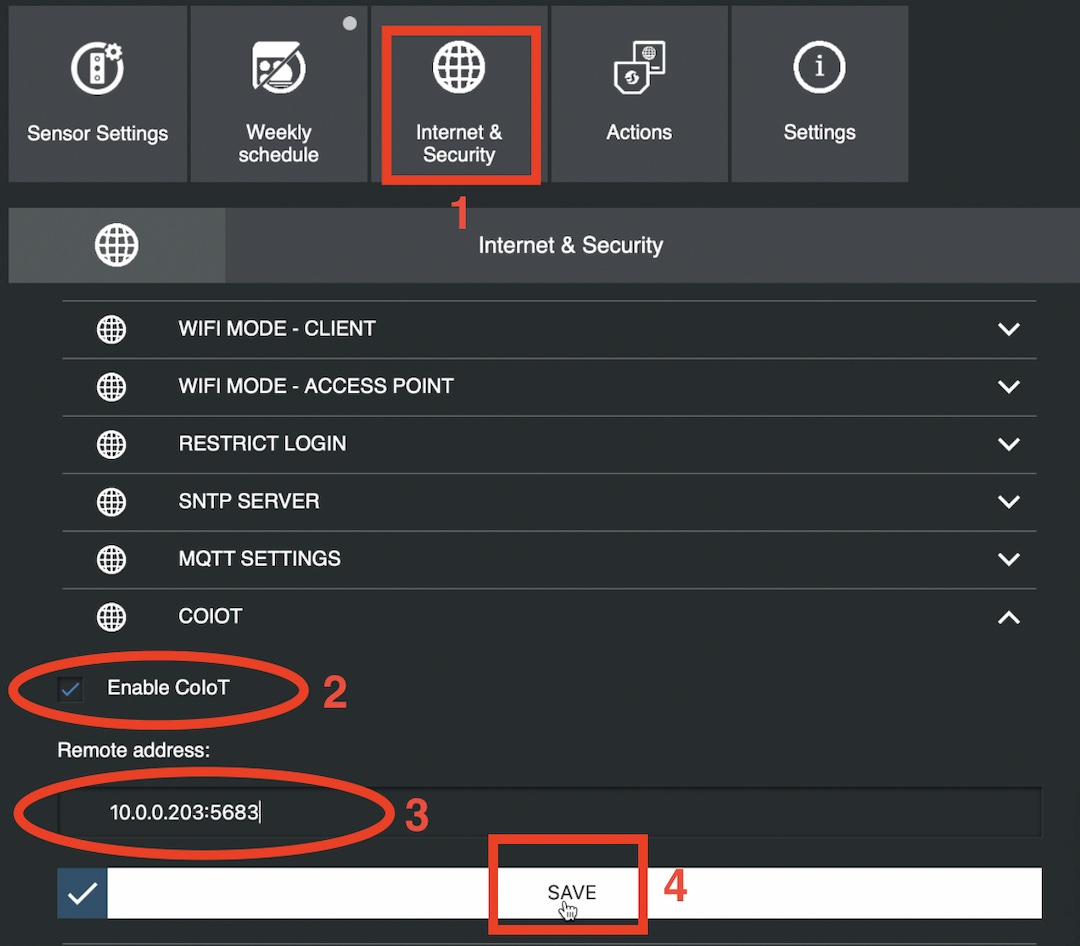
- Go to Internet and Security menu and Enable CoIoT. As a remote address, type your Home Assistant IP and as port enter 5683. At the end you should have something like YOUR_HA_IP:5683. When you are ready hit Save button.
- After that, reboot the TRV device.
- In Home Assistant, press the “c” button on your keyboard and start typing Integrations, then select Navigate Integrations > Add integration and search for Shelly. Alternatively, you can click on the My Home Assistant button below, which will lead you to the same/correct place.

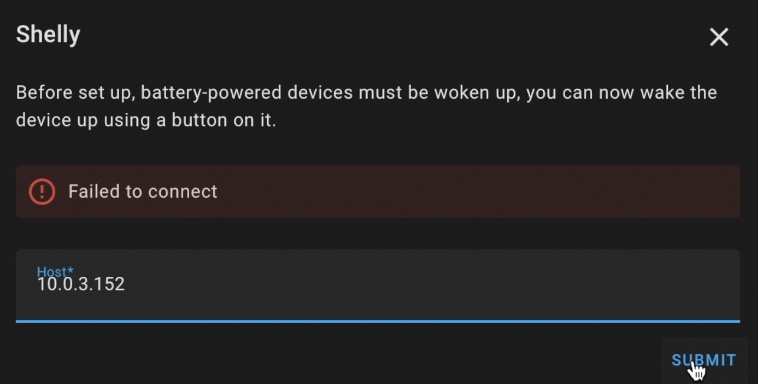
- If your device is not auto discovered, click on the “No, set up an other instance of Shelly” link and enter the IP of the Shelly Thermostatic Radiator Valve.
- Wake the Shelly Device by pressing any of its buttons and click Submit.
- If everything is fine you should have the Shelly TRV added in Home Assistant as one device with two entities.
- If you click on the newly added device you should see some readings like the current temperature, the battery level and the heating target. Of course, you can add this as card to your Home Assistant dashboard by clicking on the Add to Lovelace button.

Where to buy?
If you want to buy the Shelly TRV or other Shelly Products you can use the affiliate links to the official Shelly store below. Doing this I will receive a small commission from your purchase with no additional cost for you.
- Official Shelly Amazon Store – https://amzn.to/34d88VR
Shelly TRV Home Assistant automation
There is no real use of just adding the Shelly TRV to Home Assistant and then nothing else. That is why I will show you two real life Home Assistant Shelly TRV automations that I think will be useful for you.
The automations will be temperature based. Shelly TRV is having an integrated temperature sensor, but every radiator-mounted thermostat has a slight deviation from the actual room temperature, since the temperature measurement is performed too closely to the radiator. To avoid that, I will use my $6 dollars DIY Temperature and Humidity Sensor already added in Home Assistant (my article about the T&H sensor) as external temperature sensor to control the Shelly TRV more precisely.
Based on this temperature sensor reading – If the temperature inside my room goes above 22 degrees Celsius the automation will stop the Shelly TRV and the Radiator. Respectively, if the temperature inside goes below 20 degrees the Home Assistant automation will start the Shelly TRV. But let’s see that in action.
- Copy and paste the next YAML code inside your automations.yaml file & reload your automations.
- Alternatively, you can use the Home Assistant visual automation editor as shown in my video.
# automations.yaml entry
alias: 'Shelly TRV above 23'
description: ''
trigger:
  - platform: numeric_state
    entity_id: sensor.living_room_temperature #change this to your sensor
    above: '23'
condition: []
action:
  - service: climate.set_temperature
    data:
      temperature: 0
    target:
      entity_id: climate.shellytrv_60a423d92bfe #change this to your Shelly
mode: single
The following automation will start the Shelly Thermostatic Radiator Valve if the temperature inside goes below 20 degrees.
# automations.yaml entry
alias: Shelly TRV below 20
description: ''
trigger:
  - platform: numeric_state
    entity_id: sensor.living_room_temperature #change this to your sensor
    below: '20'
condition: []
action:
  - service: climate.set_temperature
    data:
      temperature: 30
    target:
      entity_id: climate.shellytrv_60a423d92bfe #change this to your Shelly
mode: single
New Patreon joined
Just want to share that Ron Yara joined my Patreon family. Many, many thanks Ron! Your support is really appreciated and you are helping me a lot to continue doing what I do. Ron, don’t forget to join my Discord to receive one of your Patreon benefits
Outro
In case you are a bit lost with the words and abbreviations that I used during this article go to https://peyanski.com/glossary and download my PDF glossary which is absolutely Free.
I’m Kiril and I’m done writing. Bye!
Thank you for your introduction. In addition to that it would be interesting how I can send the temperature of an additional sensor in home assistant to the external temperature corrections endpoint at the Shelly TRV (Sensor Settings -> Temperature offset). So that I can use the “Auto temperature control” of the Shelly TRV with a different Temperature sensor.
The bit of this I am trying to get my head around before I move from the Honeywell Evohome system I have to a HA / Shell based system is this… I need to have HA switch on the boiler (via a Shelly) if any of the TRV’s are requesting heat.. that’s the bit that I just do not know home assistant well enough to do!
Hiya! I think it could be done with relay switch
I followed the above instructions, but I only get 1 device with 1 entity (battery level) for the TRV 🙁
try the following:
Navigate to the local IP address of your Shelly device, Networks >> Outbound websocket and check the box Enable, under server enter the following address:
ws:// + Home_Assistant_local_ip_address:Port + /api/shelly/ws (for example: ws://192.168.1.100:8123/api/shelly/ws), click Apply to save the settings
I can’t find Networks >> Outbound websocket in firmware 2.1.8
Hi, I can see the trv in the Shelly app, fixed ip address, but can not access trv via local IP address. How can I wake up the device?
Device responds to any Chang via the Shelly app.