
I’m about to share a method for Home Assistant remote access, that I’ve been using for years. I’m talking about Home Assistant CloudFlare tunnel.
Table of Contents
More about this Home Assistant Remote Access using CloudFlare method
This method is easy to implement and works on all types of networks, including those without Real IPs and behind CGNAT.
It’s fast, well-maintained, requires no port forwarding, and allows SSL access. It used to be completely free until very recently, but now it costs me 7 cents per month for a paid domain name.
It was all free…
Not so long ago, I used a free domain from freenom.com. Unfortunately, the free domain configuration is no longer working, because the free domains from freenom.com were banned by CloudFlare, rendering this combination useless.
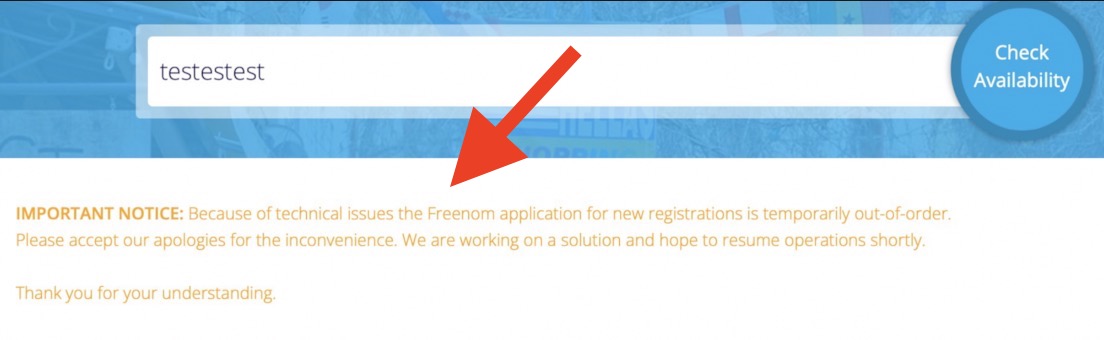
I don’t blame CloudFlare, as it seems that freenom.com has not been accepting new registrations for a long time, and their free service may not be reliable anymore.
The alternative!
After the free domains were banned, I searched for alternatives, but couldn’t find a free and reliable domain.
NOTE: If you happen to know of a free working domain, please share them in the comments.
However, I did find a super cheap option – .xyz domains containing only digits, which suited my needs perfectly, since I only needed something easy to remember. These domains cost around $0.90 cents per year, which is roughly 7 cents per month, and most importantly the renewal price is the same.
Domain + CloudFlare configuration
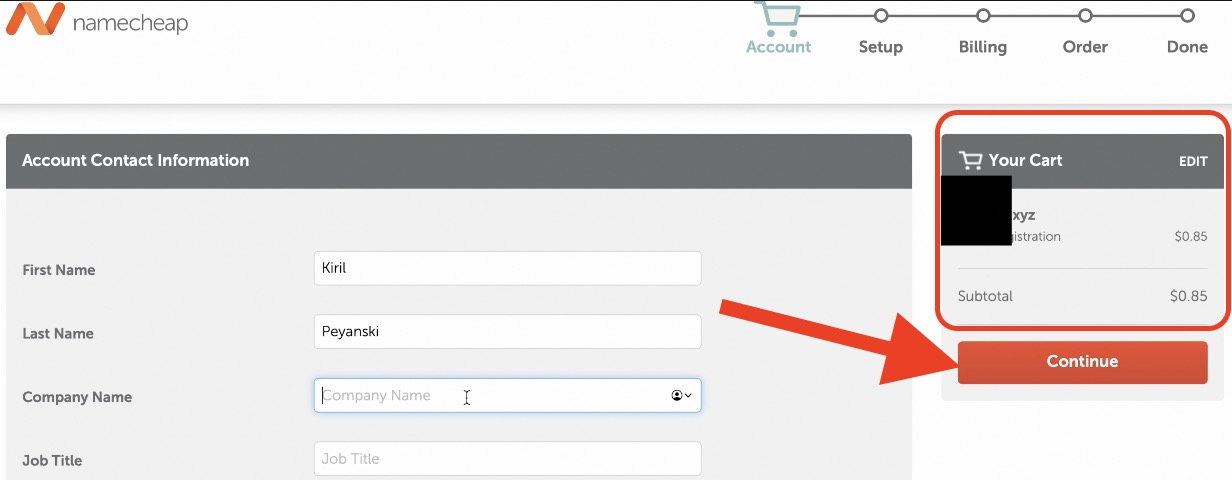
To implement this method, I bought a 6-digit .xyz domain from namecheap registrar – http://shrsl.com/43swo

You can choose any domain you like, and it doesn’t have to be digits only. If you’re willing to pay for other domain extensions like .com or .org, that works as well.
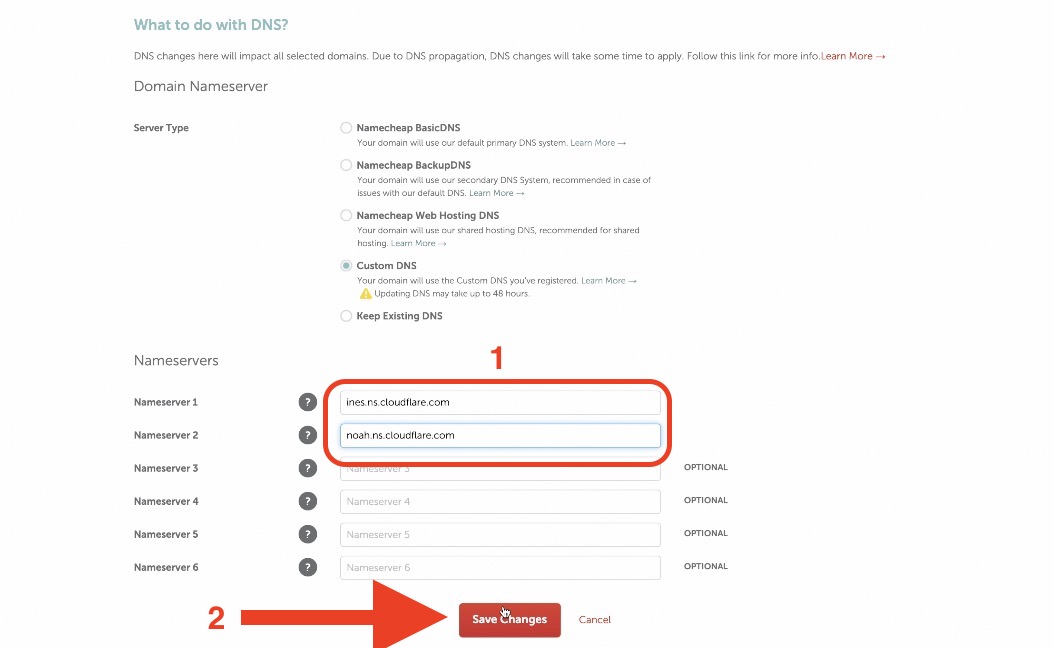
Once I had the domain, I opened my namecheap.com domain settings and changed the DNS to the ones I have in my CloudFlare account.
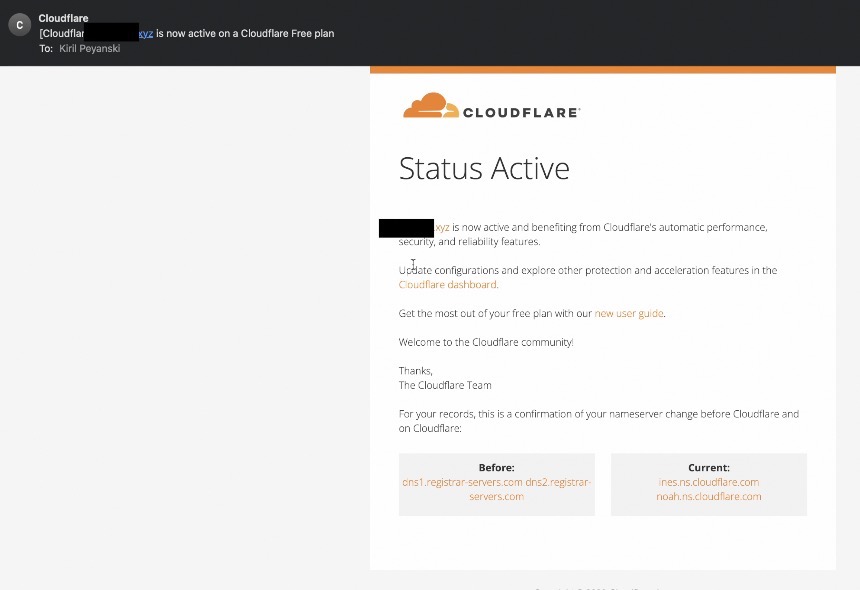
You’ll need a CloudFlare account for this method, but that shouldn’t be an issue, as it is free. These are the CloudFlare DNS-es that I used:
- DNS1: ines.ns.cloudflare.com
- DNS2: noah.ns.cloudflare.com
In my CloudFlare account, I added the new site using the domain I purchased from namecheap. I selected the free plan, which works fine.
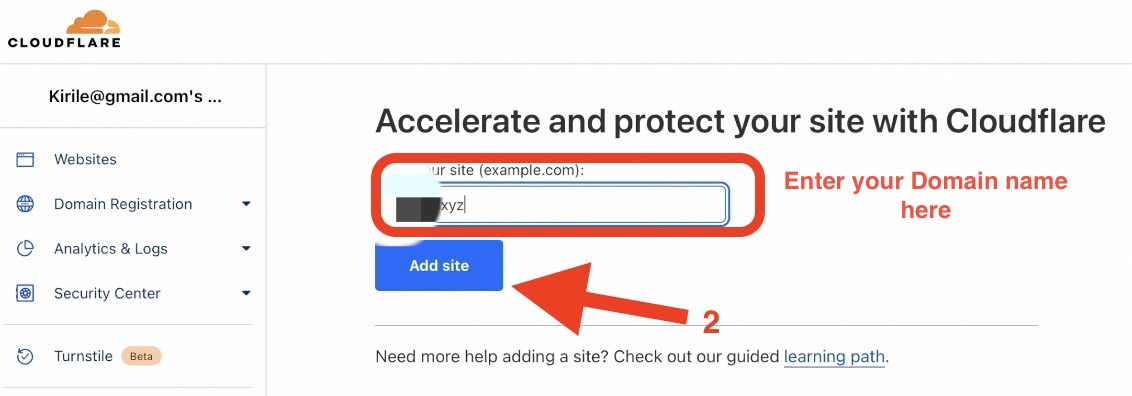
After a brief wait (less than 1 hour) for the domain to start using the new CloudFlare DNS, my setup was complete.
If you don’t have Home Assistant add-on store
If you don’t have add-on store in Home Assistant, that means you are not running Home Assistant OS or Supervised installation. To learn more about the different Home Assistant installation types and their pros & cons + 1 super simple way to get started on a PC, then register for my upcoming webinar.
Reserve your seat here – https://automatelike.pro/webinar
Home Assistant CloudFlared Add-on installation
Next, I installed the CloudFlared add-on available in the Home Assistant add-on store. To do this:
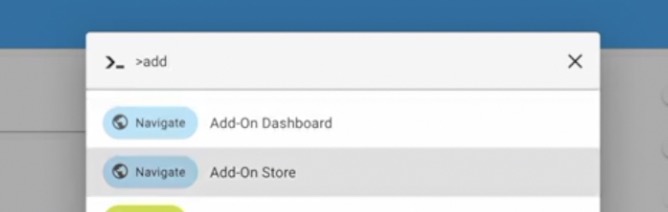
- I opened the Home Assistant add-on store (press “c” button and start typing “add-on store“)
- added the CloudFlared repository from the Three dots menu (upper right) > Repositories (Greetings to Tobias),
- GitHub Repo – https://github.com/brenner-tobias/ha-addons
- or use this My Home Assistant link to do the same
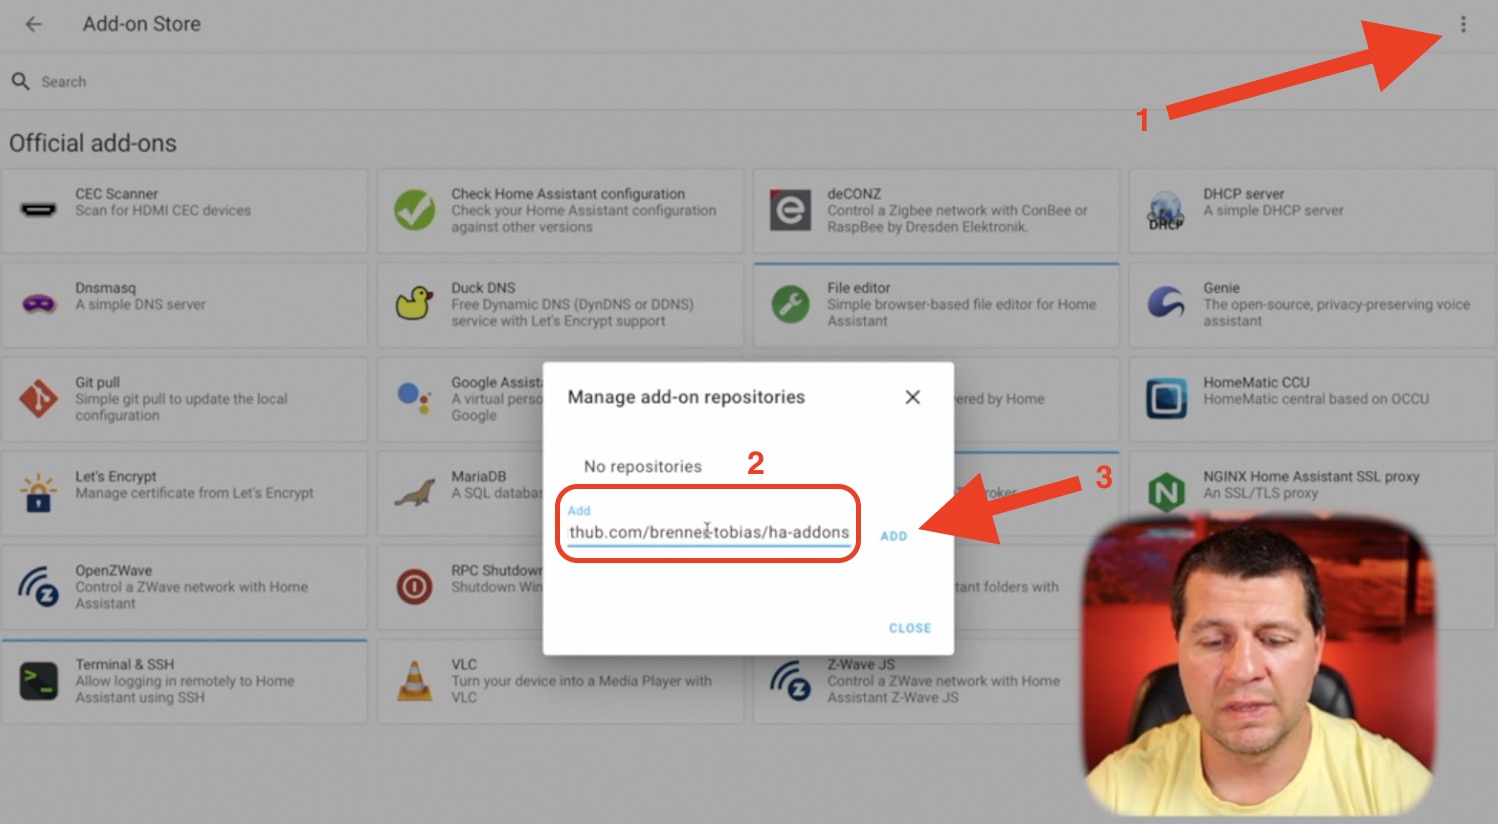
- installed the add-on

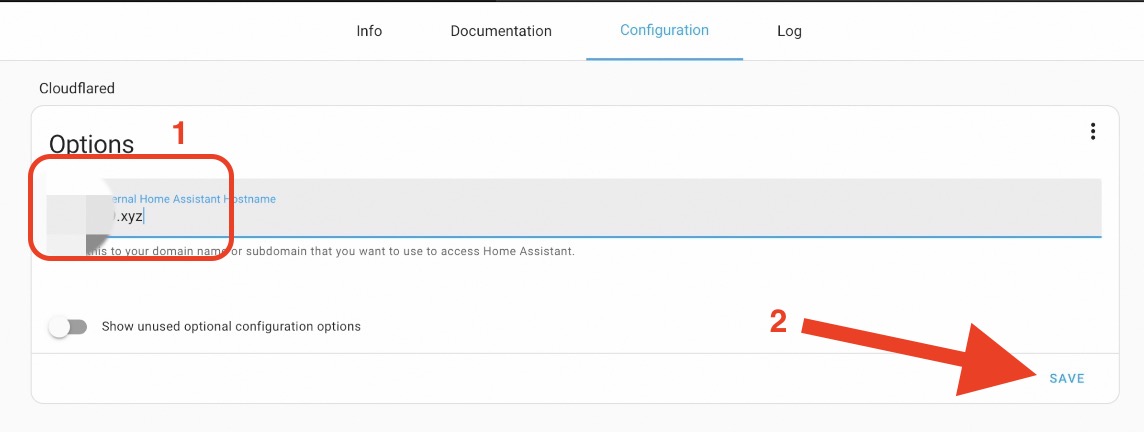
- and configured it with my .xyz domain from the Configuration tab of the CloudFlared add-on.
- I also added some YAML code in my
configuration.yamlfile to allow requests from the CloudFlared add-on.
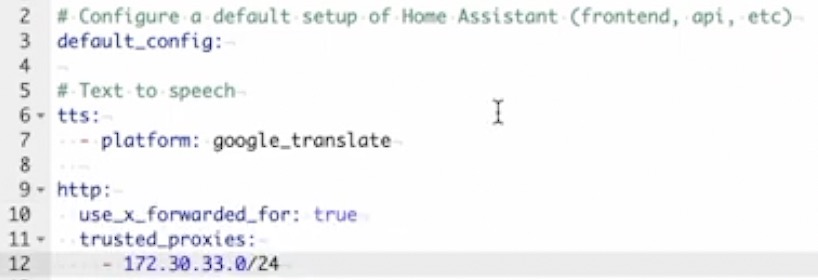
# configuration.yaml entry
http:
  use_x_forwarded_for: true
  trusted_proxies:
- 172.30.33.0/24- I saved the above changes and I restarted my Home Assistant
With everything set up and Home Assistant was running again
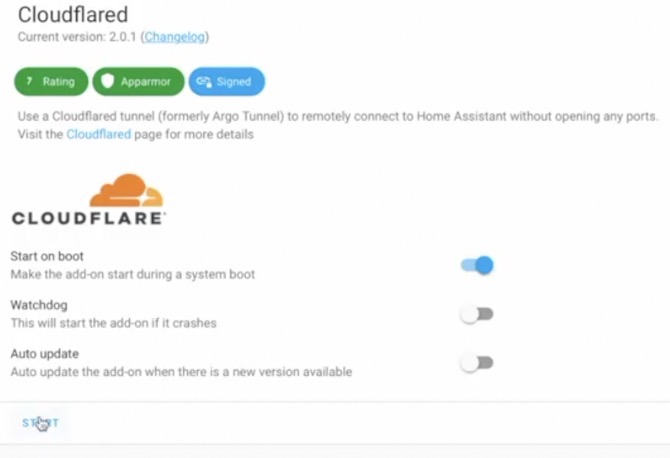
- I started the CloudFlared add-on
- I opened LOG tab of the CloudFlared add-on and I copy/pasted the URL provided by CloudFlare in a new browser/tab.
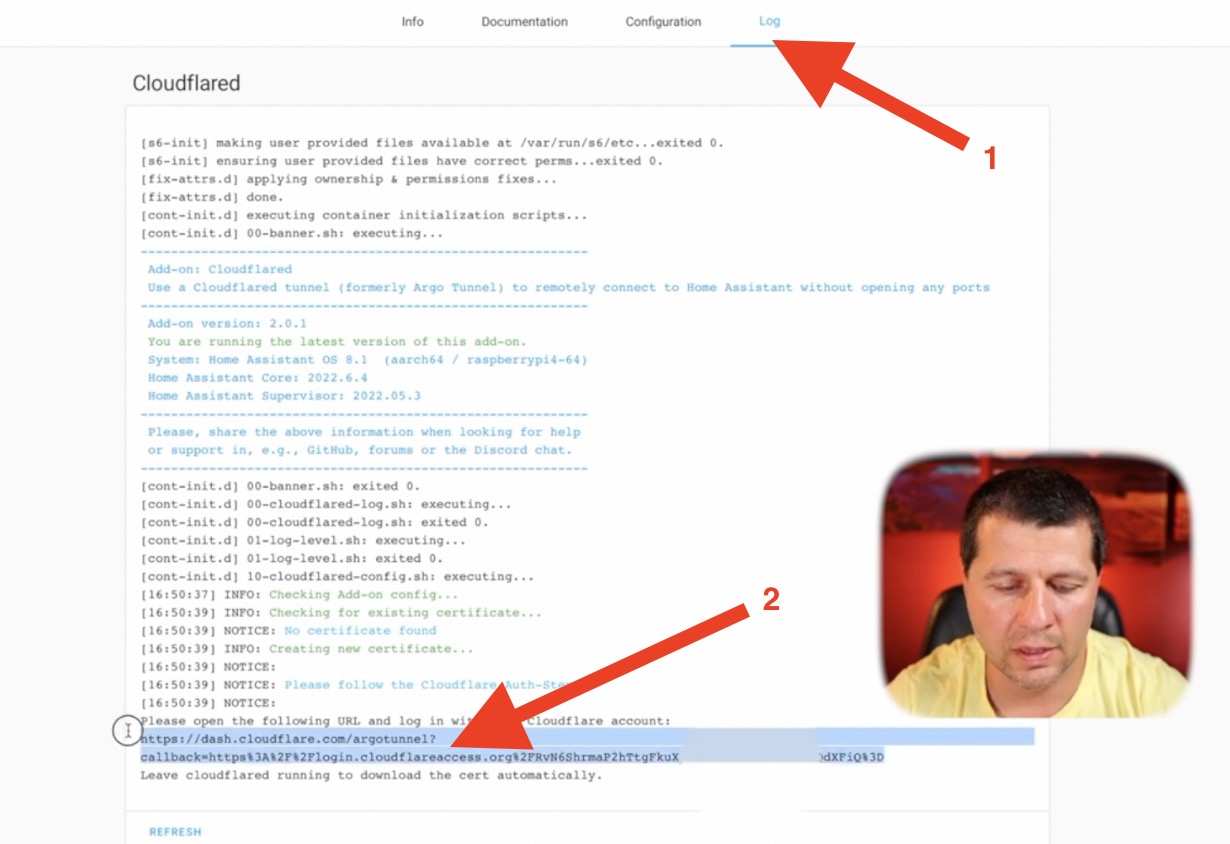
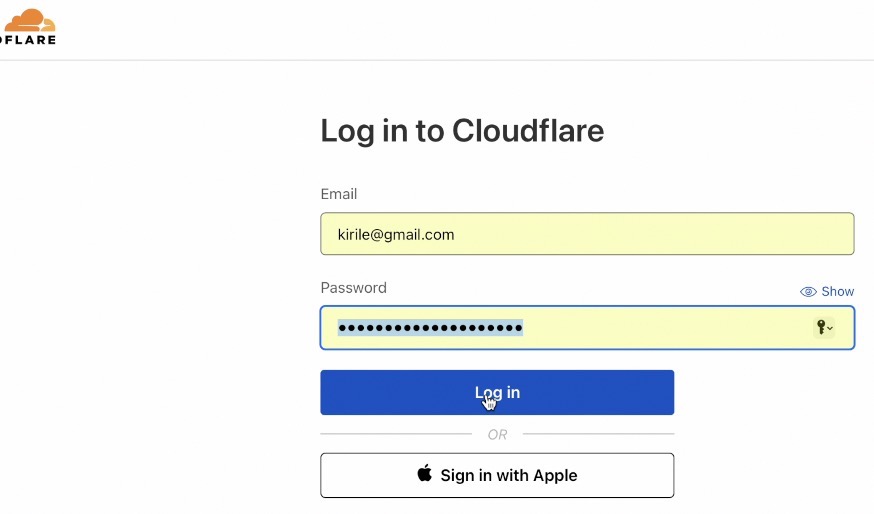
- I logged in with my CloudFlare credentials, and confirmed the creation of my Home Assistant tunnel.
Home Assistant Remote Access with CloudFlare tunnel
Once the CloudFlared Home Assistant add-on was started, I could access my paid domain name with digits only (which costs 7 cents per month) from my browser.
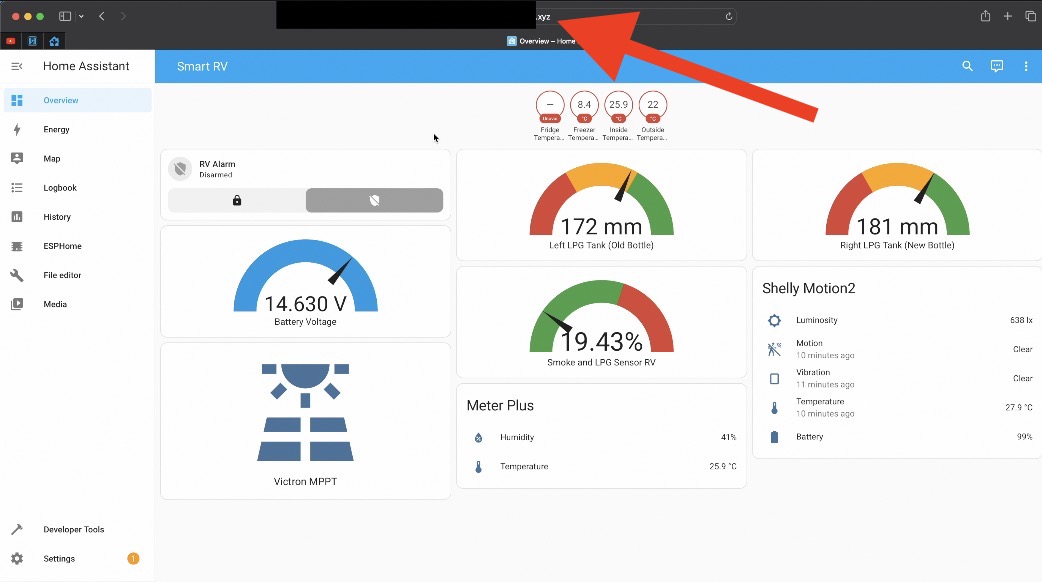
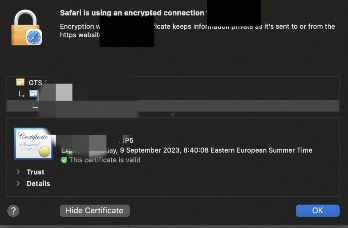
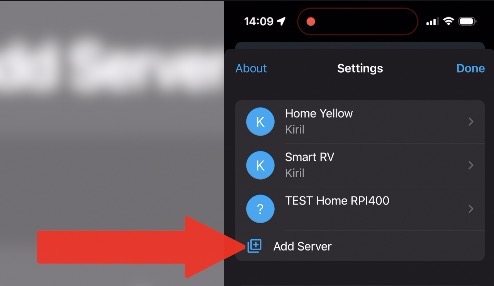
It worked flawlessly over HTTPS with no SSL certificate warnings, allowing me to set up my mobile Home Assistant companion app to use the domain address as well.
Other Home Assistant Remote Access methods
Before I continue further, let me mention some other methods for achieving similar Home Assistant remote access.
Home Assistant Cloud
The Home Assistant Cloud or Nabu Casa subscription, directly from the Home Assistant authors, is the easiest but most expensive option, costing around $6.5 to €7.5 per month, depending of your location.
You can activate it from the Home Assistant settings.
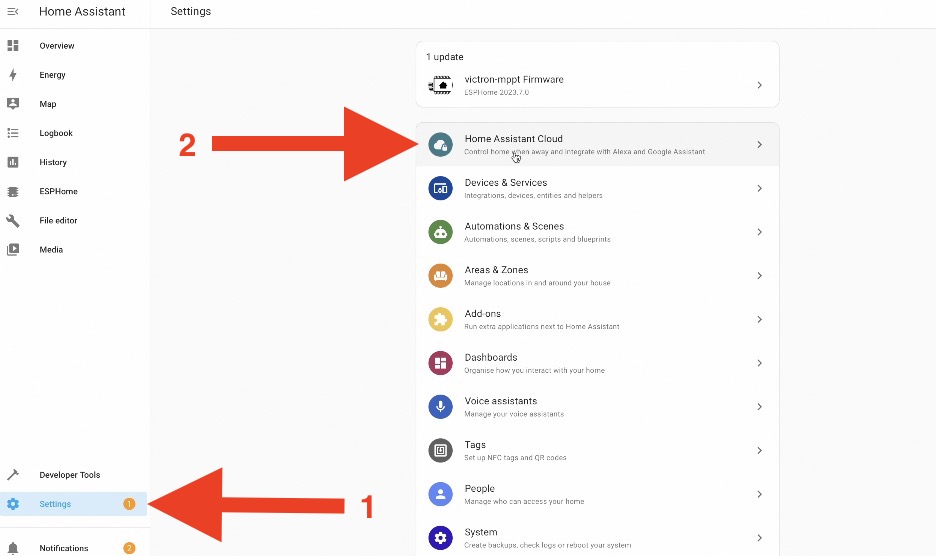
Home Assistant Cloud
There are also free methods like using DuckDNS or NginX Home Assistant add-ons with a free duckdns.org subdomain, but these may not work in all networks or countries.
- Home Assistant Remote Access with DuckDNS and Let’s Encrypt
- Home Assistant Remote Access using NGINX Reverse Proxy & DuckDNS
VPN is another good option, but it has limitations, such as the lack of push notifications from the Home Assistant companion app.
- WireGuard VPN from Home Assistant Easy Setup
- Raspberry Pi into VPN (Video How-To)
- Home Assistant ZeroTier add-on | How to setup ZeroTier network and to add Home Assistant inside?
- How to install Home Assistant Container + Remote Access using Twingate
The method I’m describing using CloudFlare Tunnel is in the golden middle; it’s cost-effective, universal, and works almost anywhere.
Final thoughts + Smart Home Glossary
In conclusion, for less than an hour of setup and less than a dollar per year, I have a secure and reliable HTTPS connection to my Home Assistant.
If you know of a better domain name deal that has been confirmed to work, please share it in the comments.
Don’t forget to download my free smart home glossary.
Thanks for reading! I’m Kiril, and I’ll see you in the next one. Bye!
Thanks for making this tutorial. some days ago I tried using Freenom and saw it didn’t work so thanks for making this tutorial. But it doesn’t seem to work for me, as far as I can see I have done exactly the same as you with no result except “can’t reach this page” any tips?
check the logs for errors and warnings
Thank You. A Home Assistant newbie (set up on a Pi4 and playing with it for less than a month) I followed your instructions and it seems to be working as advertised.
I tried your setup, but all I get when using my domain with digits is this:
2023 Copyright. All Rights Reserved.
The Sponsored Listings displayed above are served automatically by a third party. Neither Parkingcrew nor the domain owner maintain any relationship with the advertisers.
Privacy Policy
What am I doing wrong?
I have seen now the site displayed is inserted by namecheap in CNAME redirecting to parkingpage.namecheap.com.
In the logging in cloadflare I sen bad request as error.
Thank for the tutorial.
However, I’ve a question:
How to access remotely to the vaultwarden addon trought cloudlare tunnel ?
I no longer know how to log in to the bitwarden mobile application
Regards
Kiril, thanks this was genius! All set up and working after fiddling around with my settings. I originally had Duckdns on my old Internet provider, new one is CGNAT so no IP4 address for me. anyway, I got it working, just a couple of issues left. main one is that Homeassistant no longer sees my Philips Hue bridge. is there a configuration change I need to make for it to be recognised?